


Built in Wardrobe | Custom by DBM Factory


Built-In Wardrobe
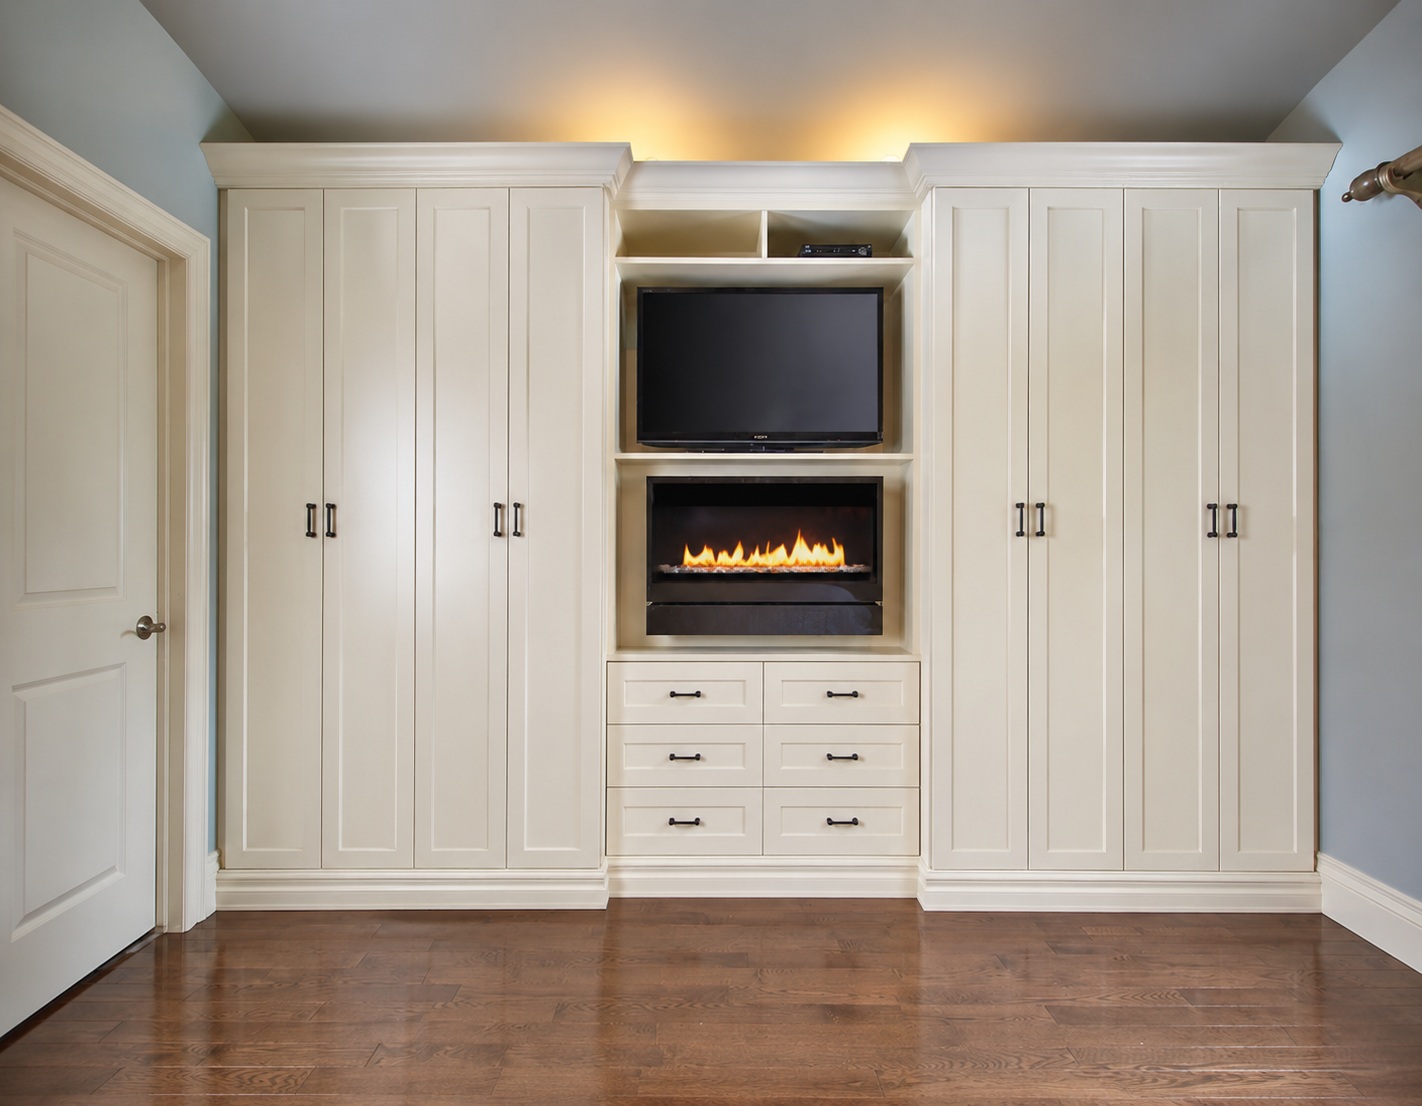
A built-in wardrobe runs wall-to-wall, flush with the architecture, and reads as part of the room itself. Door faces line up with the trim. Side returns die into the plaster. The bedroom looks larger because the wardrobe stops competing with it. Done well, the storage disappears — until you open it.
We design and produce each built-in around your project. Share the wall dimensions, ceiling height, and a designer reference. We turn it into a working drawing and build each module ready for shipment.
Build It Flush to the Room
Wood Species — Oak / Walnut / Ash Veneer
Oak veneer for a calm, classic bedroom palette. Walnut where the wardrobe should feel richer against painted walls. Ash for lighter, contemporary rooms. Engineered cores keep tall door faces flat.
Door Style — Panel / Slab / Slatted
Flat slab doors when the wardrobe should disappear. Panel or shaker doors for traditional rooms. Slatted door fronts where the wardrobe reads as a design feature in the bedroom.
Hardware — Push-to-Open / Recessed Pulls
Push-to-open hinges keep door faces uninterrupted. Recessed J-pulls or fingertip channels give a clean line. Standard pulls in brass or matt black where the room calls for visible hardware.
Mirror Insert — Full-Height Panel
A full-height mirror inset into one door face brings light deeper into the bedroom. Often placed on the door closest to the window so the reflection extends the view rather than the wall.
Where It Fits — Four Common Project Types
Villa Secondary Suite
The built-in spans the longer bedroom wall, ceiling to skirting. Walnut or stained oak doors with recessed pulls is a common villa direction, keeping the bedroom calm against patterned linens and rugs.
Apartment Master Bedroom
Often the only storage wall in the room, so capacity matters. Slab doors finished to match the wall paint make the wardrobe read as a single plane — the bedroom feels longer than its footprint suggests.
Boutique Residence
A designed bedroom where the wardrobe is part of the architecture, not separate joinery. Slatted door fronts or panel doors add the texture; the side returns scribed to the wall so nothing reads as out-of-the-box.
New Home Built-In
Drawn into the architect’s plan from the start so the wardrobe wall is framed correctly. Ceiling height set on the working drawing means the doors run all the way up — no dead band of bulkhead above.
From Sketch to Site — Three Stages
Share the wall length, ceiling height, and a designer reference — that’s enough to start. We turn it into a working drawing for the built-in. It covers the door positions, side returns, and the bulkhead allowance your contractor will need to frame.
Every module is fully assembled and photographed in our Guangdong workshop before being taken apart for shipping. Each cabinet, door, and hardware kit comes labeled, so on-site assembly is straightforward — typically bolt-and-cam, not site-cutting.
Wooden crates built for ocean freight, packed in the order your installer will assemble. Shipped to 60+ countries — including the USA, Australia, the EU, and across Asia.
After delivery, your contractor or installer handles fitting. We provide an assembly guide and a step-by-step video. Where local installation is available in your region, we can help you find a vetted installer.
Built-In Wardrobe
When the Ceiling Slopes — Fitting Storage Under the Eaves of a Loft Bedroom.
A converted loft bedroom is full of character and short on square walls. The roof rakes down to a low knee wall on one or both sides, so a conventional full-height wardrobe simply will not stand against the slope. The angled ceiling is the whole challenge, and it is exactly where the usable storage hides.
Owners reach us once the loft has become a proper bedroom and the awkward low zone is the remaining difficulty. A freestanding piece looks wrong marooned in the room, and the triangle of space under the eaves stays dead. So the brief is precise. They want fitted joinery that follows the roofline and converts that low, sloping pocket into usable wardrobe space.
Why a Built-In Beats Freestanding Under a Slope.
The roofline is the reason. A freestanding wardrobe is a fixed rectangle, so it has to sit forward where the ceiling accommodates its full height, leaving the whole triangle behind it wasted. A built-in is drawn to the actual slope, so its top edge follows the raking ceiling and the storage reaches right into the low corner.
That angled profile is what recovers the space. The tall side carries a hanging rod where the headroom allows, the configuration steps down as the ceiling falls, and the lowest zone takes drawers or shoe shelves that need no height at all. The room reads as architecture rather than furniture pushed against a wall. The geometry effectively converts an unusable triangle into practical, accessible storage.
The trade-offs stay honest, as always. The low end cannot hang full-length garments, and a particularly shallow slope angle limits how deep the lowest cabinet can be. Where the eaves are generous, the built-in carries a full mix; where they pinch tight, the low zone becomes drawers and the hanging moves to the tall wall. We resolve the geometry against your real elevation, well before any panel is cut.
How the Built-In Follows the Roofline.
The Slope Angle Comes First.
The inclination of the ceiling governs everything above it. We take the slope as a measured line, then cut the top of each carcass to match the gradient. The wardrobe then meets the raking plasterwork in a clean diagonal rather than a stepped gap. The tall end holds the full-height hanging; the configuration then steps down in stages to follow the fall of the roof.
The Low Knee-Wall Zone Comes Next.
The lowest pocket, where the slope meets the knee wall, is the part most rooms surrender. We populate it with shallow drawers, pull-out shoe trays, or a simple shelf module that needs no standing height. A short hinged door or a drawer front closes the low zone cleanly, so the dead triangle becomes the most-used storage in the room.
The Dormer and Purlin Come Last.
A loft rarely offers a clean slope. A dormer window interrupts the run, or a structural purlin projects across the ceiling at an inconvenient height. We draw the configuration to wrap the dormer reveal and to duck beneath the purlin, scribing each panel to the surfaces that already exist. Nothing has to be trimmed on the floor to make the installation sit true.
What Coordination Looks Like for a Sloped-Ceiling Built-In.
Drawing-First Coordination begins with the elevation of the sloping wall. We confirm the tall height, the low knee-wall height, the slope angle, and the position of any dormer or purlin before anyone cuts a panel. A raking ceiling leaves no tolerance for a guess, so the working drawing resolves the angled profile on paper first. We return it for you to check against the real roofline.
Trial Assembly Before Packing then stands the stepped run upright on our Guangdong workshop floor. We assemble the angle cuts exactly as drawn, verify each drawer clears the lowest carcass, and confirm the hanging rod sits at the correct height under the tall wall. Then we dismantle the run, label every carcass and panel, and record the sequence it follows back together under your roof.
Export-Ready Crating packs the components in the order your installer will raise them against the slope, the angled top panels protected so the diagonal stays true. We seat the heaviest carcasses low in the crate and wrap the finished faces for the long ocean passage. The shipment lands sorted, ready to lift, position, and assemble straight against the drawing.
What to Send Us About Your Loft.
A photo of the sloping wall from across the room shows us the roofline at a glance. Add the tall height where the ceiling is full, the low height at the knee wall, and the wall length the wardrobe will run. A rough note of the slope angle, even just the two heights, lets us draw the diagonal correctly.
One more detail rounds out the picture. Tell us about any dormer window or projecting beam along the run, and roughly what the wardrobe has to hold. From there we turn your notes into a working drawing and a fitted built-in ready to ship.
After delivery, fitting is on your side. On site, your contractor or installer handled fitting directly from our drawings, with our assembly guide and step-by-step video to follow — or use your own local installer where needed.
Chat on WhatsApp →Compare the Sliding Door Wardrobe → · see the Freestanding Wardrobe → · browse the full Closet & Wardrobe range → · or explore all our cabinetry →